Let’s check how to use Canvas with Javascript.
Canvas is a cool feature that lets you draw graphics on a web page using JavaScript. You can create animations, games, charts, and more with Canvas. In this post, I’ll explain the basics of Canvas and how to use it with some examples. Let’s get started!
First, you need to create a Canvas element in your HTML file. You can do this by using the <canvas> tag, like this:
<canvas id="myCanvas" width="300" height="200"></canvas>
This creates a Canvas element with an id of “myCanvas”, a width of 300 pixels, and a height of 200 pixels. You can change these values as you like, but make sure to give your Canvas element an id so you can access it later with JavaScript.
Next, you need to get a reference to the Canvas element in your JavaScript file. You can do this by using the document.getElementById() method, like this:
var canvas = document.getElementById("myCanvas");
This assigns the Canvas element to a variable called canvas. Now you can use this variable to access the Canvas methods and properties.
One of the most important properties of the Canvas element is the context. The context is an object that provides methods and properties for drawing on the Canvas. You can get the context by using the getContext() method, like this:
var ctx = canvas.getContext("2d");
This assigns the context to a variable called ctx. The “2d” parameter indicates that we want to use a two-dimensional drawing context. There are other types of contexts, such as “webgl” for 3D graphics, but we’ll stick with “2d” for now.
Now that we have the Canvas element and the context, we can start drawing on the Canvas. There are many methods and properties that you can use to draw different shapes, colors, styles, and more on the Canvas. I’ll show you some of the most common ones in this post, but you can find more details in the MDN documentation.
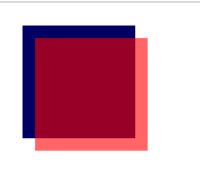
One of the simplest things you can do with the Canvas is to draw a rectangle. You can do this by using the fillRect() method, like this:
ctx.fillRect(50, 50, 100, 100);
This draws a filled rectangle on the Canvas with the following parameters:
- The first two parameters (50, 50) are the x and y coordinates of the top-left corner of the rectangle.
- The next two parameters (100, 100) are the width and height of the rectangle.
- The default color of the rectangle is black, but you can change it by using the fillStyle property before calling fillRect(), like this:
ctx.fillStyle = "red";
ctx.fillRect(50, 50, 100, 100);
This changes the color of the rectangle to red.
You can also draw an outline of a rectangle by using the strokeRect() method instead of fillRect(), like this:
ctx.strokeStyle = "blue";
ctx.strokeRect(50, 50, 100, 100);
This draws a blue outline of a rectangle with the same parameters as before.
You can also draw other shapes on the Canvas, such as circles, arcs, lines, curves, and more. For example, you can draw a circle by using the arc() method, like this:
ctx.beginPath();
ctx.arc(150, 150, 50, 0, Math.PI * 2);
ctx.fill();
This draws a filled circle on the Canvas with the following parameters:
- The first two parameters (150, 150) are the x and y coordinates of the center of the circle.
- The next parameter (50) is the radius of the circle.
- The next two parameters (0, Math.PI * 2) are the start and end angles of the circle in radians. A full circle is equal to Math.PI * 2 radians.
- The last parameter is optional and indicates whether to draw the circle clockwise or counterclockwise. The default is clockwise.
- The beginPath() method starts a new path for drawing.
- The fill() method fills the current path with the current fill style.
You can also use stroke() instead of fill() to draw an outline of a circle.
There are many more things you can do with Canvas, such as adding text, images, gradients, patterns, shadows, transformations, and more. I’ll leave those for another post or you can explore them on your own. I hope you enjoyed this introduction to Canvas and learned something new.